Materials
- A micro:bit
- Can be v1 or v2 - I'm using a v2 board
- A 4-pin analog non-addressable LED strip
- Can also be done with a digital addressible strip, but will require code modifications
- 3-pin addressible strips can have cooler effects - my strip is cheap and lame
- Data cable & gator clips or wires
If you want a permanent connection, you'll also need a soldering iron and a hot glue gun. For my use case, I also needed a 3D printer to create the housing for the micro:bit and double-stick tape for keeping the strip connected.
Why
The micro:bit features 2 front buttons and an LED matrix, which is useful for viewing & changing information. Micro:bit v2 even features a microphone which can be used for sending sound-reactive colors. The easily programmable chip is powerful enough to create cool lighting transitions.
How it works & power usage
The connection is super simple. We simply use the m:b data pins (0, 1, 2) for sending values for the R, G, B pins to the strip.
Power requirements depend on your strip. For my strip, I can power it through the m:b 3.3V out pin. Check the small text on the LED strip input pins - longer & brighter strips require more voltage. For strips which require more than 3.3V, it's more viable to connect an external power supply.
Making it work
The easiest part is the software. By detecting when a button is pressed, we change the value output of the 0, 1, and 2 pins. I've decided to go with the Microbit Python editor but the micro:bit's nRF52833 chip can be programmed through the Arduino IDE as well. My code is available here.
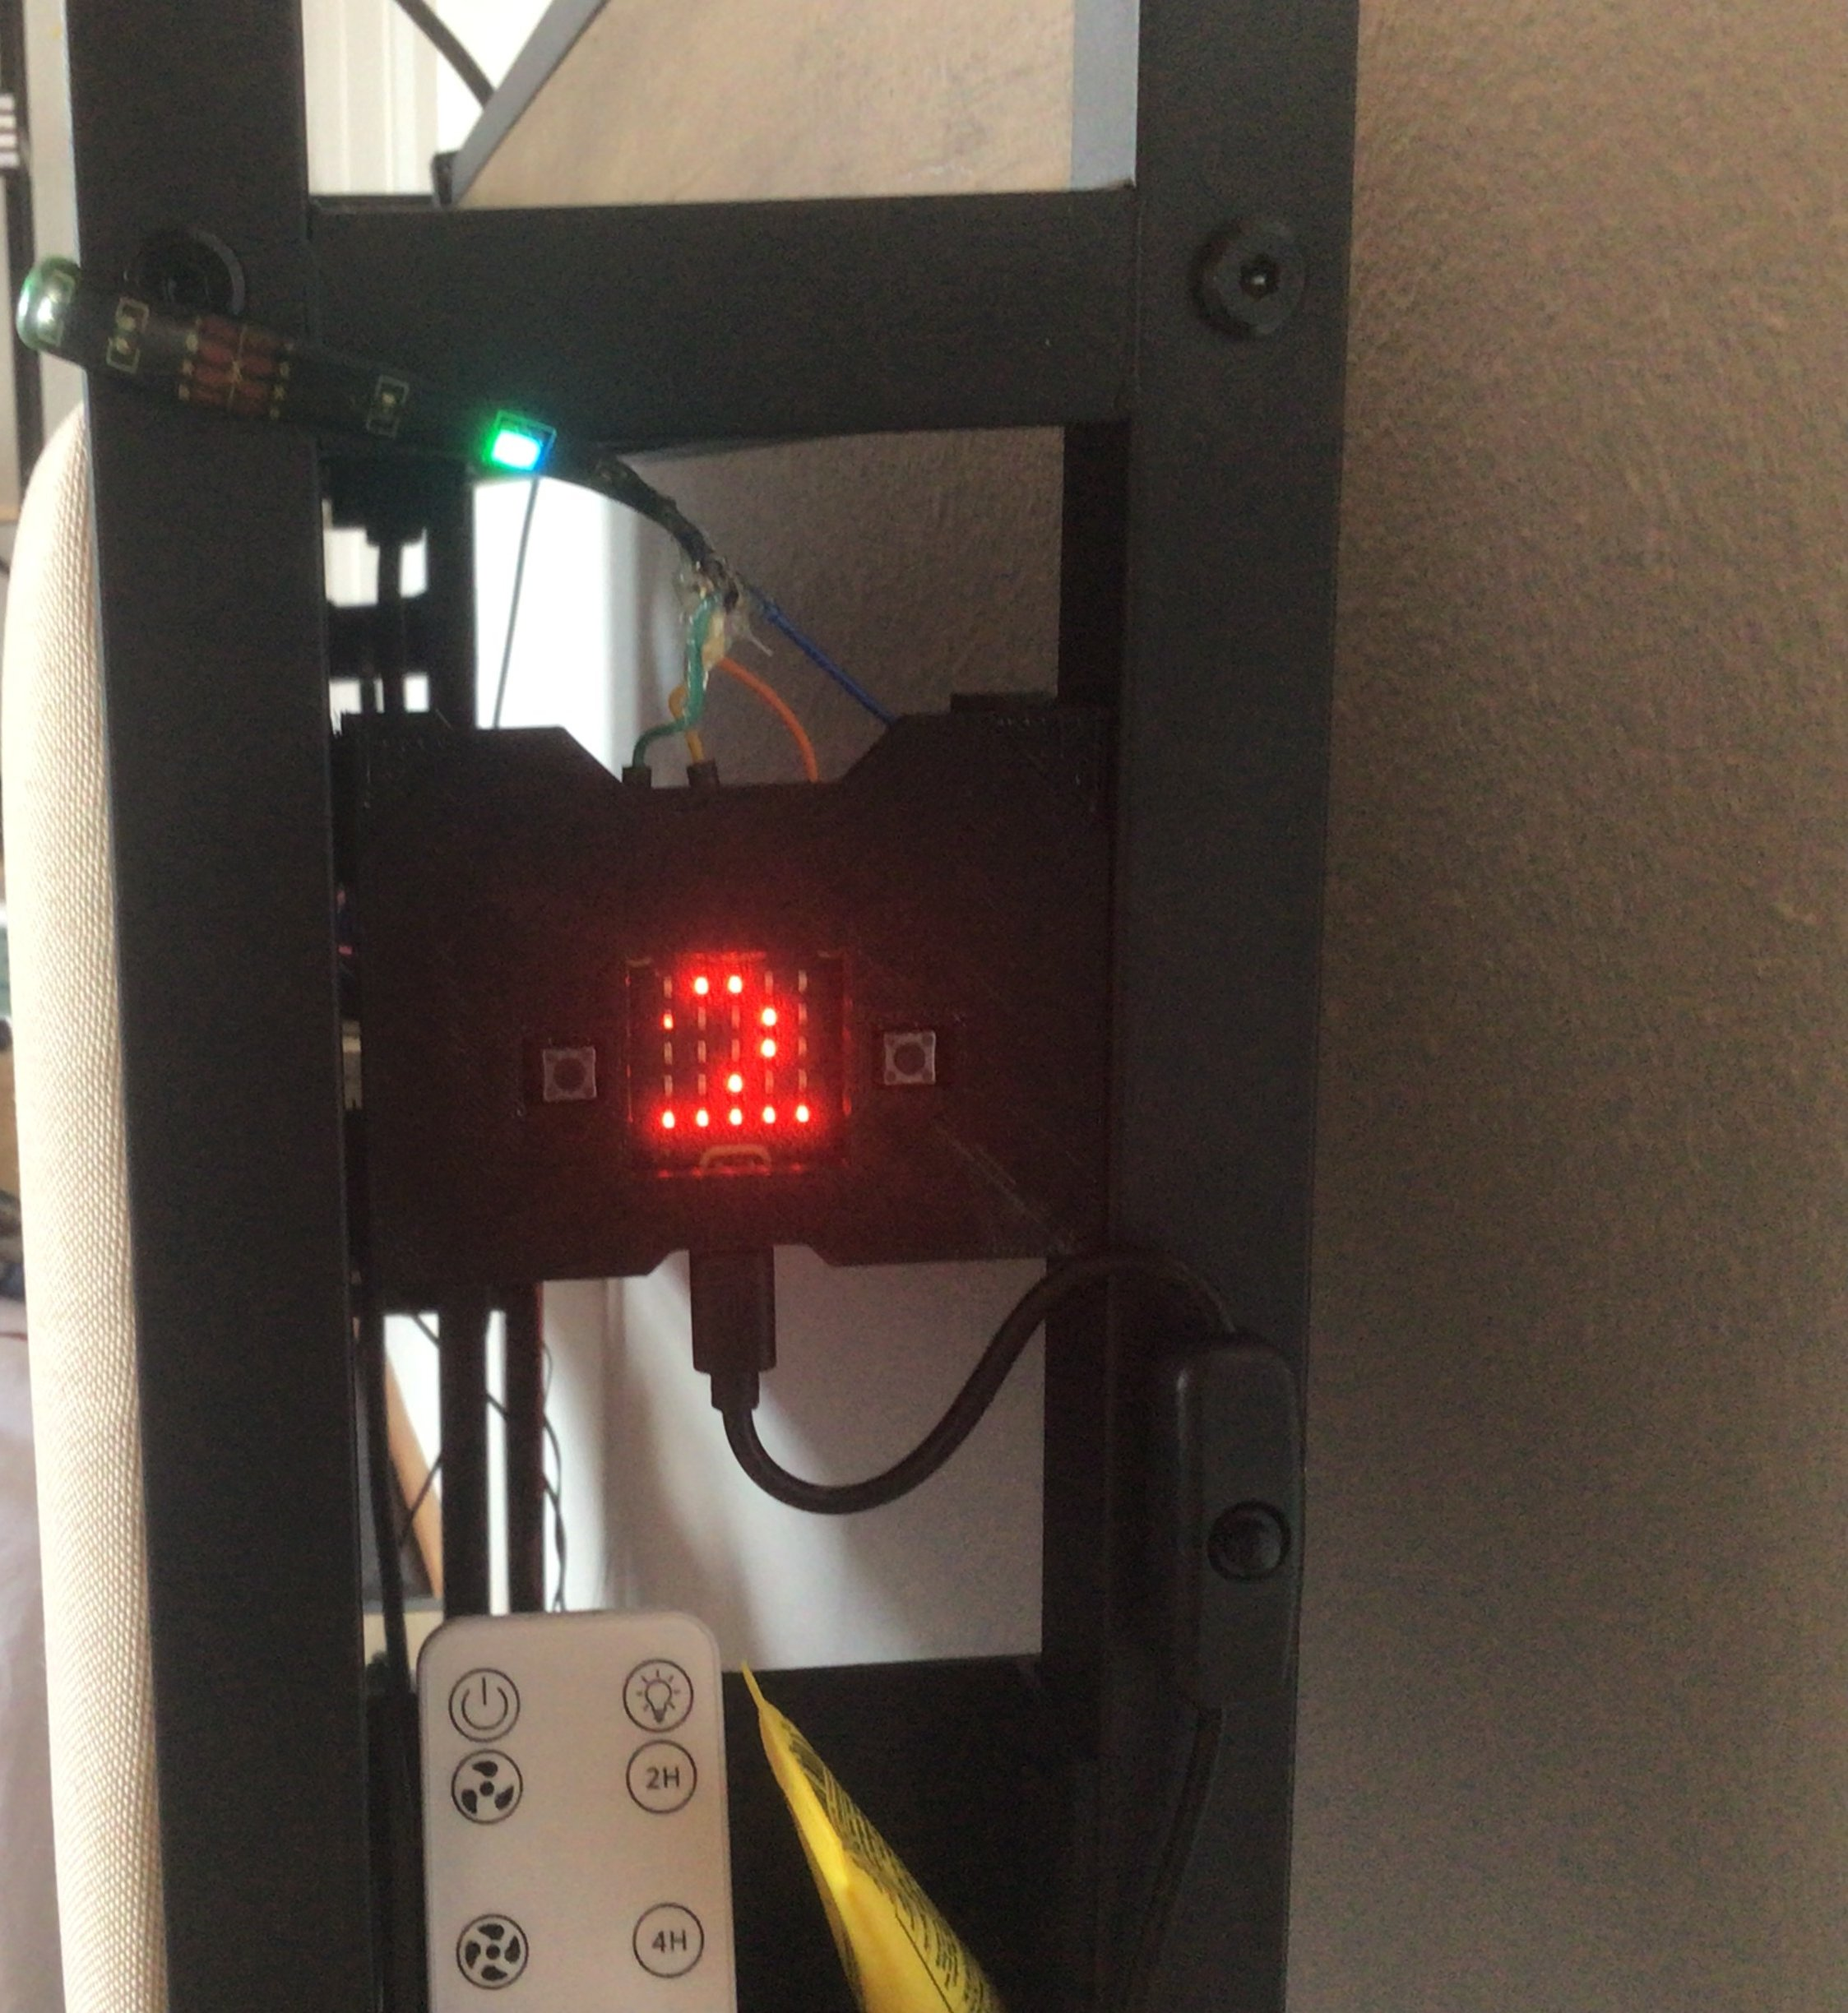
Mounting the micro:bit
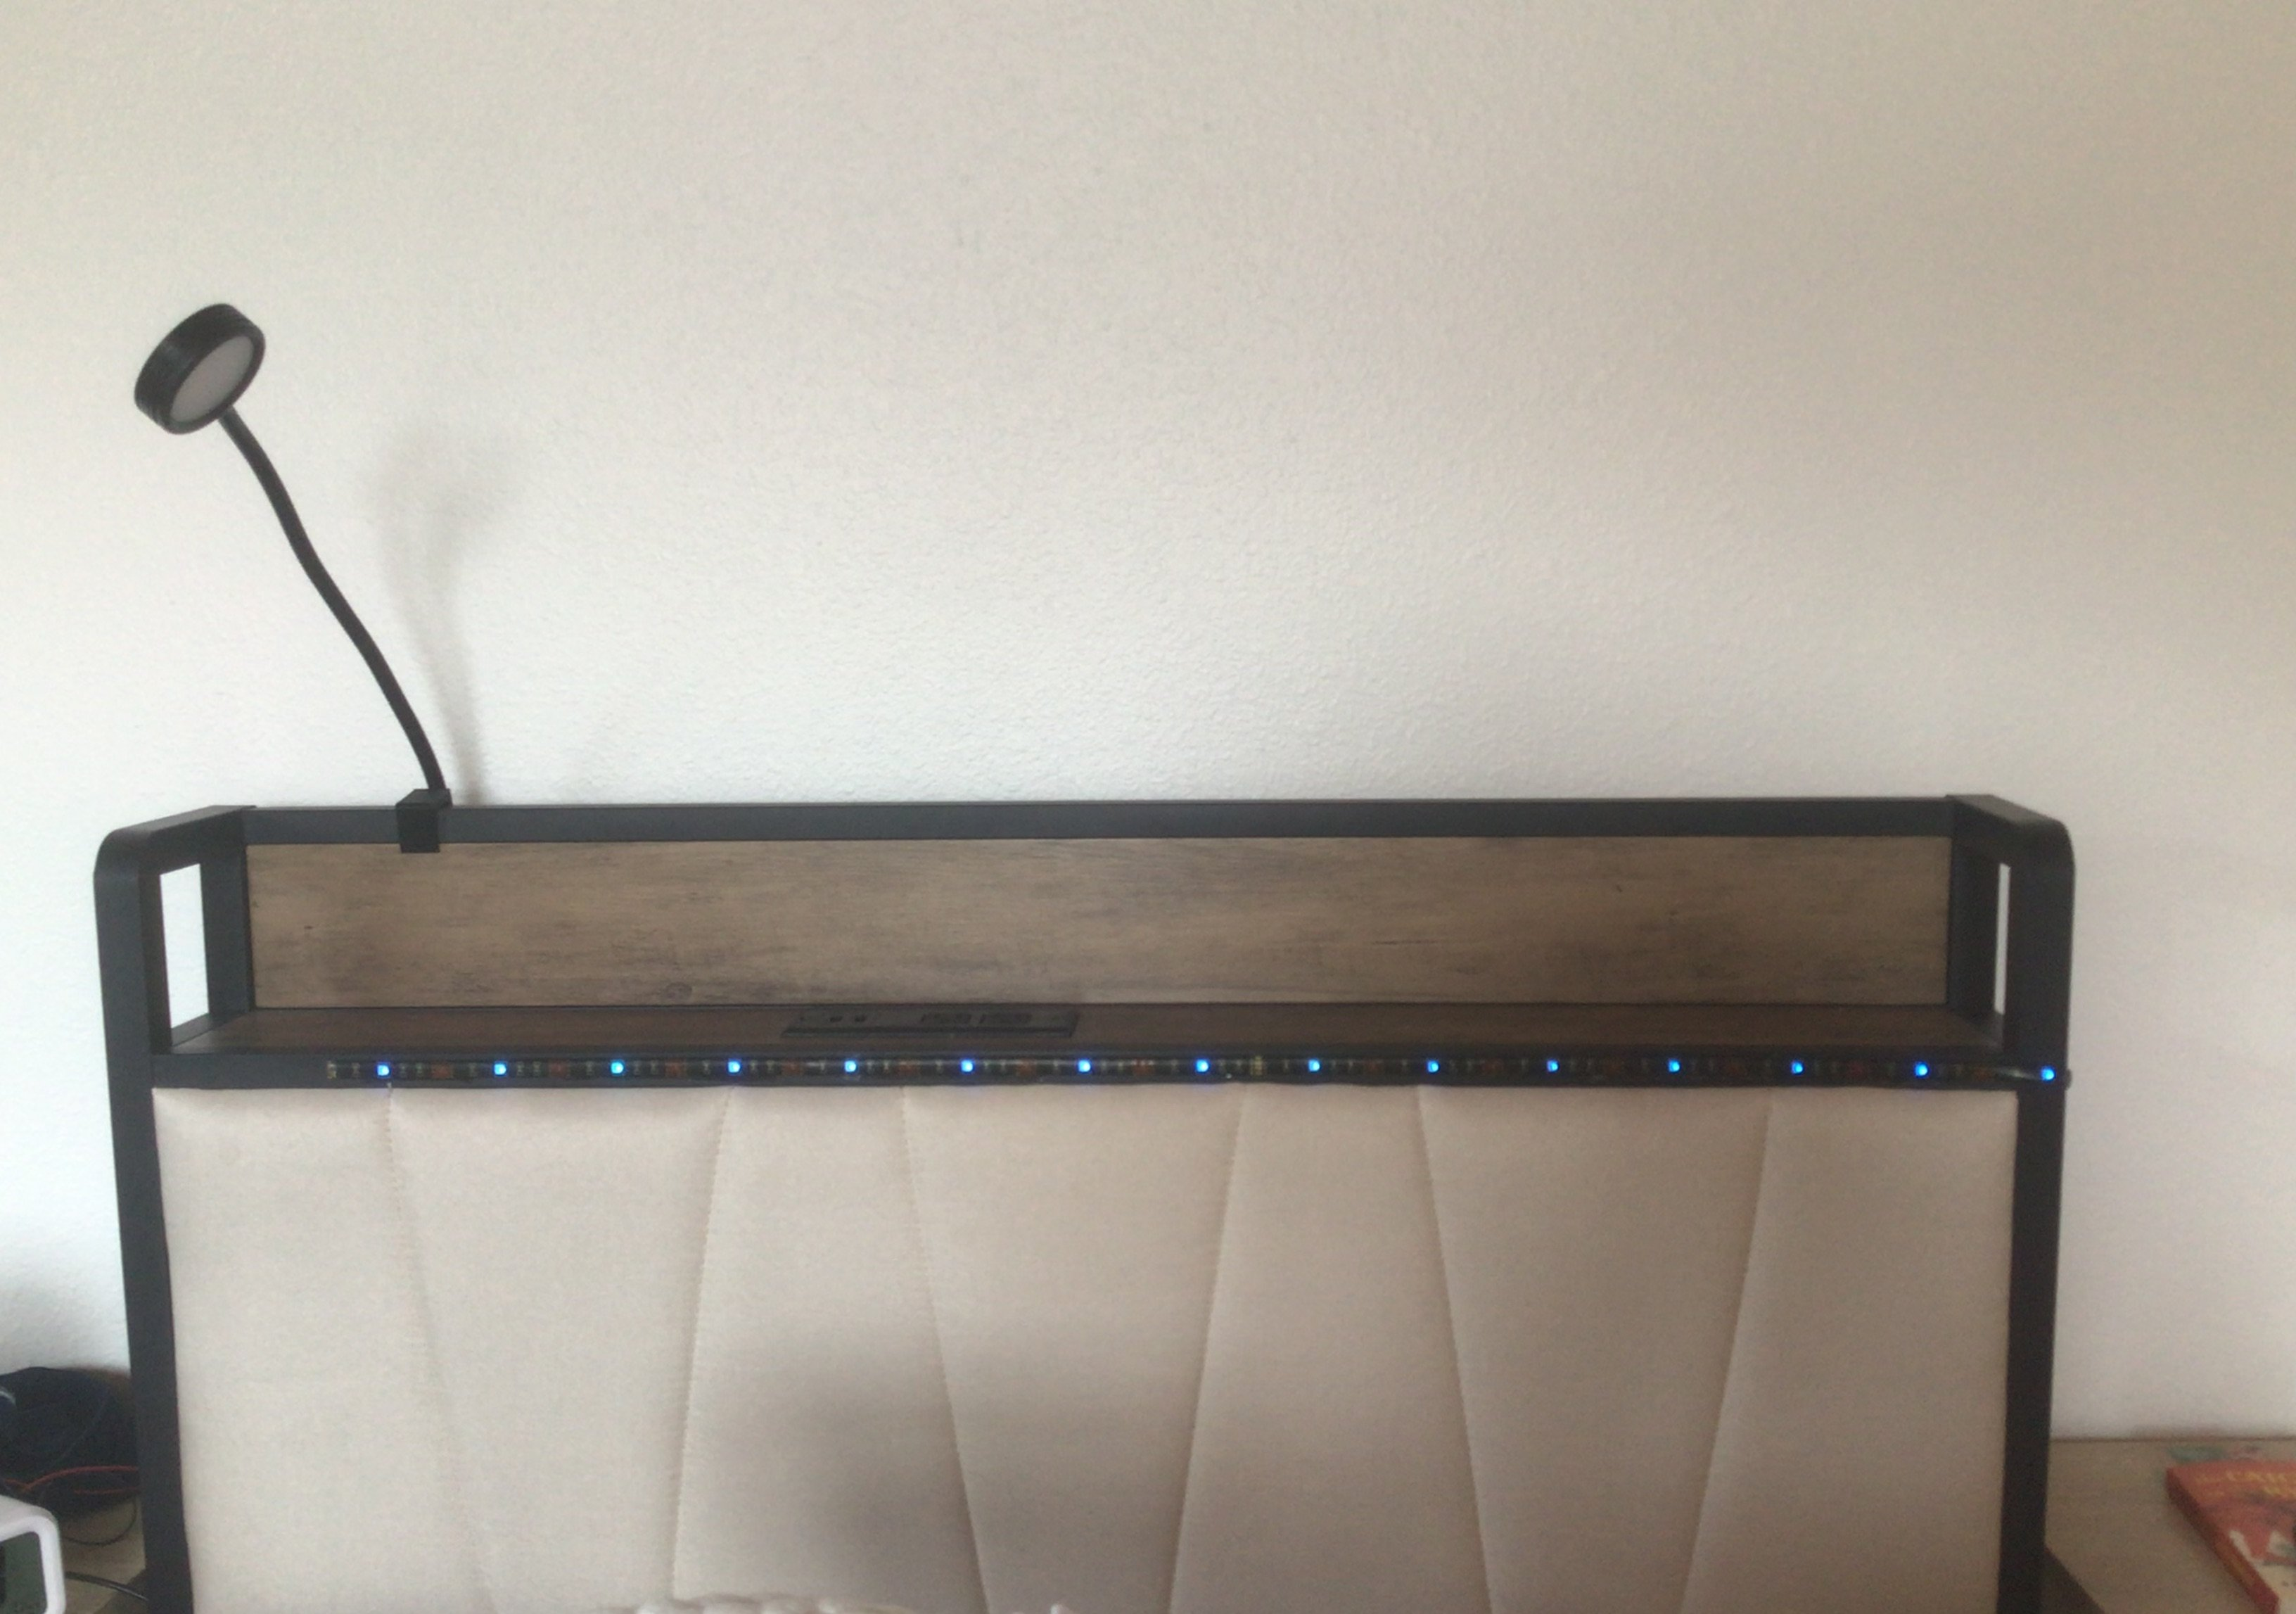
My bed headboard is the perfect length for this strip. I have plenty of space in between my headboard bars to print a permanent mount.
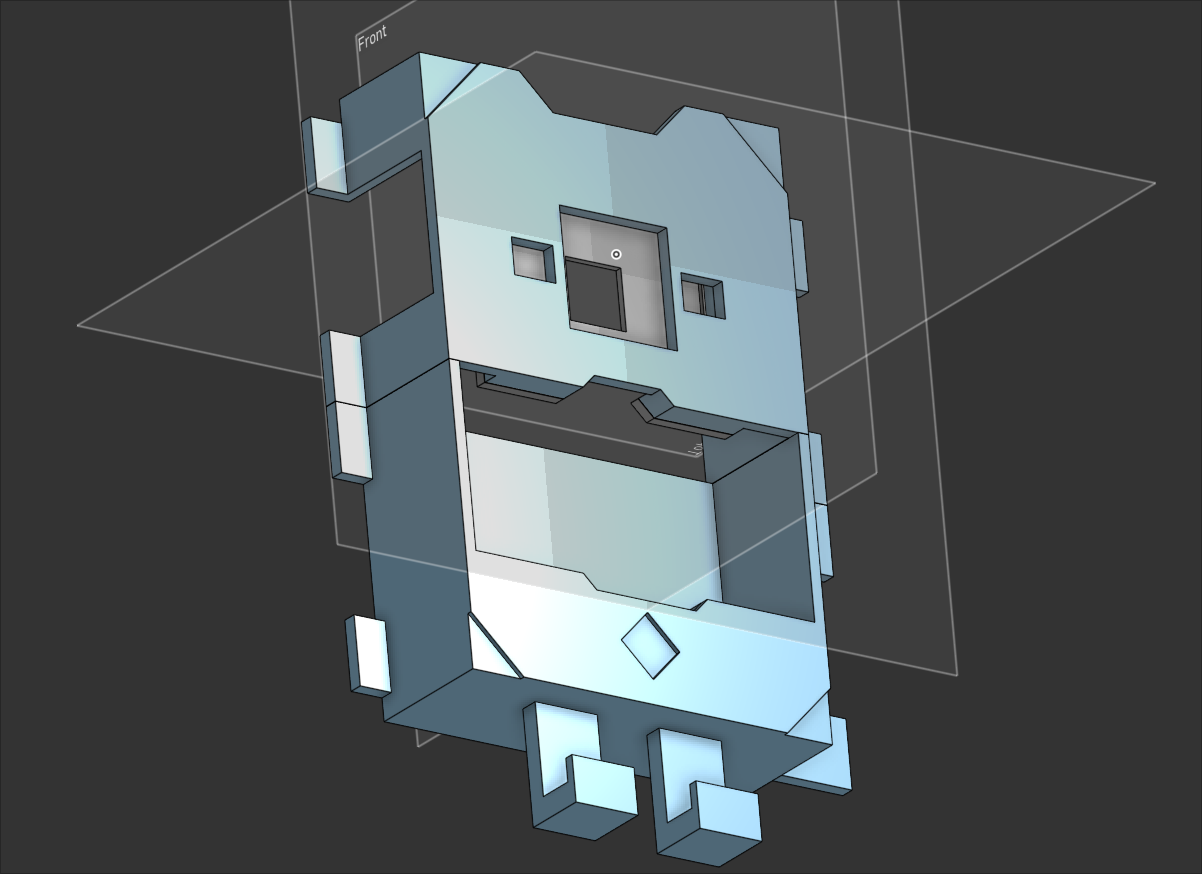
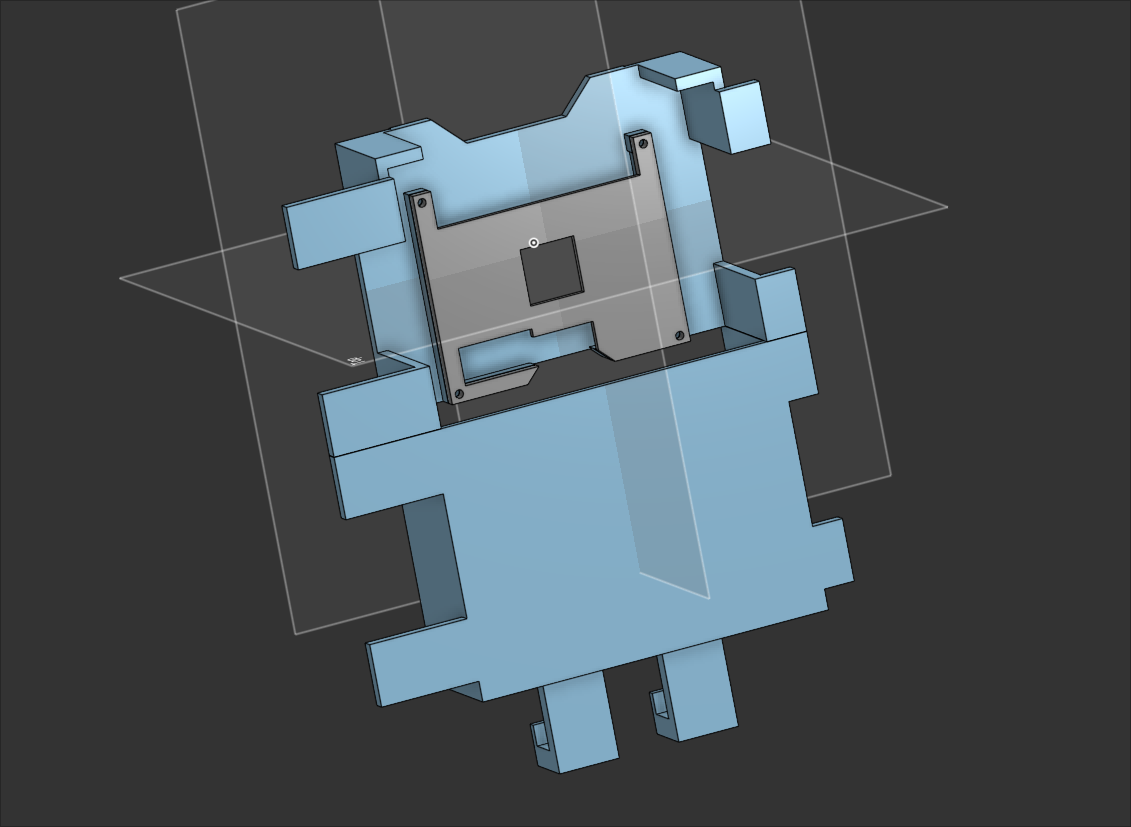
Using Onshape, I modeled the LED case (available here) and printed it. I mounted it to the headboard bars using duct tape and used double-stick tape to connect the LED strip with the headboard. To make sure the micro:bit doesn't fall out of its casing, I printed and taped a back cover. I also purchased a micro USB power toggle so I can easily turn the device on and off.
Result